This wiki is a XML full dump clone of "Heroes Wiki", the main wiki about the Heroes saga that has been shut down permanently since June 1, 2020. The purpose of this wiki is to keep online an exhaustive and accurate database about the franchise.
Jason Badower/Past Experience: Difference between revisions
Jump to navigation
Jump to search
Content deleted Content added
imported>Ryangibsonstewart →Page 1: add comments |
imported>Ryangibsonstewart remove stubs |
||
| (10 intermediate revisions by 2 users not shown) | |||
| Line 1: | Line 1: | ||
| ⚫ | |||
{{stub| needs = Jason Badower's original comments}} |
|||
| ⚫ | |||
===Page 1=== |
===Page 1=== |
||
| Line 11: | Line 9: | ||
</gallery> |
</gallery> |
||
===Page 2=== |
|||
<gallery> |
|||
Image:Past Experience, p2 layout.jpg|[[J.T. Krul]] suggested that this flashback sequence could either be drawn like [[Hiro]]'s [[:Image:Kensei and the dragon.jpg|picture book]] in the style of the [[:Image:Lindermans archives tapestry.jpg|tapestries]]. Due to time constraints, Jason opted for a more "cartoony colouring style inspired by [http://joshuamiddleton.com/ Josh Middleton]." |
|||
Image:The Seven Samurai.jpg|Jason loosely based the two fighting samurai after some of the characters from {{link|Kurasawa}}'s ''The Seven Samurai''. |
|||
Image:Past Experience, p2 line art.jpg|Jason felt it was important to differentiate this sequence from the other sequences since it took place many years ago and is essentially a story from a picture book. |
|||
Image:Past Experience, p2 colors.jpg|To distinguish the scene from other scenes, Jason employed a coloring style he hadn't used since he colored ''Killeroo: Book 2" years years ago. "I dig the heavy shadows and harsh fill lights. I also got to play with a really bold colour palette." |
|||
Image:Past Experience, p2 tones.jpg|After adding toning to [[Kaito Nakamura]]'s face, Jason says, "It's amazing how it goes from well, some dude, to being [[George Takei]]!" |
|||
Image:Past Experience, p2 scrolls.jpg|"So inspiration finally struck! My idea was to change the panel borders (or boxes) to scrolls. I wanted to give the feel that this story was very old and add a mythic element to this enjoyable fable." |
|||
Image:Past Experience, p2.jpg|To diminish the harsh white background, Jason added [[:Image:Lindermans archives tapestry.jpg|some faded arrows]]. He also added some subtle airbrushing and color mixing. |
|||
</gallery> |
|||
===Page 3=== |
|||
<gallery> |
|||
Image:Past Experience, p3 layout.jpg|"[[J.T. Krul|JT]], the writer suggested that the first panel should mirror the last panel of the last page. In fact, he had very clear directions for how he wanted the scene to run. I looked over them, and they were great. It was just a matter of designing the room and the placement of [[Kaito]] and [[Kimiko]] to make it work." |
|||
Image:Past Experience, p3 line art.jpg|"I noticed I copped some flak from some posters on 9th Wonders who didn't like my [[George Takei]]. At this stage of the game I was ready to print panel 1 out on nice piece of photopaper and mail it to his agent I was so proud. Seriously, that's George Freakin' Takei! I was so happy with it at this stage. I'm still proud of the linewor. Little was I to know that all my efforts would be thwarted by my inability to colour him." |
|||
Image:Past Experience, p3 tones.jpg|"I remember almost rubbing my hands in glee at how well this page was turning out. I really dug the lighting on the two characters and loved how it accentuated the scale of the room." |
|||
Image:Past Experience, p3 photo inserts.jpg|"So here's Jason trying to save his ass and deadline with photo textures. I can't tell you enough how much I *HATE* doing this. I feel cheap. I feel like I've asked for a refund at a $2 store. But they look nice don't they? And how about those spiffy glass effects!" |
|||
Image:Past Experience, p3 colors.jpg|"I want you to marvel at the magnificence at which I have destroyed a perfectly good likeness of George Takei. What the hell was I thinking?! If another colourist had done this to my work I would have hunted them down, nail gunned them to a chair and fed them their toes. As it was, I plead insanity." |
|||
Image:Past Experience, p3 final.jpg|"I do like the picture of Kimiko on panel 4 also. I think it really looks like her, and I like it how at the one moment that her father actually looks at her, she looks away." |
|||
</gallery> |
|||
===Page 4=== |
|||
<gallery> |
|||
Image:Past Experience, p4 layout.jpg|"I enjoyed these layouts. Simple, elegant and cinematic. I couldn't wait to draw [[Hiro]]!" |
|||
Image:Past Experience, p4 line art.jpg|"I ended up doing a screen capture from [[Kaito's funeral]] from [[season 2]] and moved people around, but it's largely the same frame. I do like my Hiro. I think I got reference from [[season 1]] here. The trees were a bit experimental for panel four and I like the gothic noir feel it has. Those of you paying attention might have seen my geek Easter Egg and noticed that I used Hiro's boss, Mr [[Kin Egami]] as the executive who confronts [[Kimiko]]." |
|||
Image:Past Experience, p4 tones.jpg|"I especially like how all the people turned out. I felt that panel 1 got a bit muddy and confusing from poor composition, though." |
|||
Image:Past Experience, p4 colors.jpg|"Panel 1 got a bit muddy, but I like the way the rest turned out. If I hadn't been referencing an actual scene from the show, I would have set this at sunset for more dramatic lighting than in the middle of a sunny day." |
|||
Image:Past Experience, p4 final.jpg|"Some added lighting effects. It was a buzz to draw Hiro again. I love drawing the guy. He's just so easy to draw. Overall for a fast, rushed page, this turned out really well. To give you an idea of how rushed, I drew and coloured pages 4, 5 and 6 over two days!" |
|||
</gallery> |
|||
===Page 5=== |
|||
<gallery> |
|||
Image:Past Experience, p5 line art.jpg|"It was actually [this page]...that really motivated me to get [[Annette Kwok|Annette]] back on board. While I'm reasonably happy with the way I colour figures, the way I colour backgrounds irritates the hell out of me. When I put heaps of effort in, it looks cheated and I don't like that. Working with Annette will give me the time to draw it properly and avoid the horrendous cheat that I used on page 5 panel 2. It was just supposed to be a placeholder, to remind me I need to draw a proper background, but computer issues [and] my deadline...forced [me] to leave the photo in." |
|||
Image:Past Experience, p5.jpg|"Two out of four backgrounds ain't so good. It's not my finest hour, but it definitely was my most desperate. Even panel 1 on page 5 annoys me. The texturing looks too realistic if you ask me. I should have gone for something more stylised. I actually get annoyed when my stuff looks too photo-like." |
|||
</gallery> |
|||
===Page 6=== |
|||
<gallery> |
|||
Image:Past Experience, p6 line art.jpg|"I ended up leaving page 5 and moving onto page 6...I had more fun with page 6 as I actually got to draw some stuff. I like the lighting of the top panel. I was also trying to mirror [[[Kaito]]]'s body language from page 3 panel 2 here on panel 2 with [[Kimiko]]. I feel that she has already become her father's daughter in this panel." |
|||
Image:Past Experience, p6.jpg|"I used a cinematic trick that they do on the show on panel 4. For some reason I notice that they use a framing blur on certain images, usually trying to highlight someone's eyes. I thought I would do the same here." |
|||
</gallery> |
|||
<small>Notes about Jason's drawings are taken from [http://jasonbadower.blogspot.com/ his weblog].</small> |
|||
{{badower}} |
{{badower}} |
||
Latest revision as of 22:39, 25 August 2009
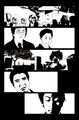
Jason Badower shares his comments and original art about his work on Past Experience.
Page 1
-
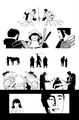
 J.T. Krul gave Jason some very specific scene directions, including the first direction which was to begin with a closeup of Kimiko and end with a closeup of Hiro. Jason thought of the transition like a camera focusing on Kimiko's hands, zooming out and slowly shifting the focus to the right, and ending on a closeup of Hiro.
 -
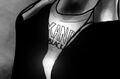
 "I wanted to draw the pants off this piece. I can't imagine how much drawing one would have to do to get someone to take their pants off, but I'm guessing it's a lot." "C'mon, look at those flowers! That's a LOT of flowers! I also had great fun drawing all the characters, but especially enjoyed drawing George Takei. It was fun de-ageing him! Welcome to the magic of comics!"
 -
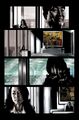
 Since the story is set during three main time periods, Jason decided to mimic the style of the flashbacks in Company Man for the flashbacks of Hiro reading about Kensei and Kimiko doing ikebani. Jason made sure to use blown out whites and deep blacks. This left him with whites that "were really white. Like white-white!" So Jason heavily airbrushed the page to achieve his desired effects.
 -
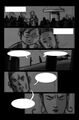
 During the creation process, Jason's new laptop began to misbehave, and Jason worried he wouldn't be able to get the comic done in time. He called his friend, Xander Black, who figured out what the problem was, and Jason was able to finish the comic on schedule. Hiro's shirt has a shout out to Xander.


Page 2
-
 J.T. Krul suggested that this flashback sequence could either be drawn like Hiro's picture book in the style of the tapestries. Due to time constraints, Jason opted for a more "cartoony colouring style inspired by Josh Middleton."
 -
 Jason loosely based the two fighting samurai after some of the characters from Kurasawa's The Seven Samurai.
 -
 Jason felt it was important to differentiate this sequence from the other sequences since it took place many years ago and is essentially a story from a picture book.
 -
 To distinguish the scene from other scenes, Jason employed a coloring style he hadn't used since he colored Killeroo: Book 2" years years ago. "I dig the heavy shadows and harsh fill lights. I also got to play with a really bold colour palette."
 -
 After adding toning to Kaito Nakamura's face, Jason says, "It's amazing how it goes from well, some dude, to being George Takei!"
 -
 "So inspiration finally struck! My idea was to change the panel borders (or boxes) to scrolls. I wanted to give the feel that this story was very old and add a mythic element to this enjoyable fable."
 -
 To diminish the harsh white background, Jason added some faded arrows. He also added some subtle airbrushing and color mixing.


Page 3
-
 "JT, the writer suggested that the first panel should mirror the last panel of the last page. In fact, he had very clear directions for how he wanted the scene to run. I looked over them, and they were great. It was just a matter of designing the room and the placement of Kaito and Kimiko to make it work."
 -
 "I noticed I copped some flak from some posters on 9th Wonders who didn't like my George Takei. At this stage of the game I was ready to print panel 1 out on nice piece of photopaper and mail it to his agent I was so proud. Seriously, that's George Freakin' Takei! I was so happy with it at this stage. I'm still proud of the linewor. Little was I to know that all my efforts would be thwarted by my inability to colour him."
 -
 "I remember almost rubbing my hands in glee at how well this page was turning out. I really dug the lighting on the two characters and loved how it accentuated the scale of the room."
 -
 "So here's Jason trying to save his ass and deadline with photo textures. I can't tell you enough how much I *HATE* doing this. I feel cheap. I feel like I've asked for a refund at a $2 store. But they look nice don't they? And how about those spiffy glass effects!"
 -
 "I want you to marvel at the magnificence at which I have destroyed a perfectly good likeness of George Takei. What the hell was I thinking?! If another colourist had done this to my work I would have hunted them down, nail gunned them to a chair and fed them their toes. As it was, I plead insanity."
 -
 "I do like the picture of Kimiko on panel 4 also. I think it really looks like her, and I like it how at the one moment that her father actually looks at her, she looks away."


Page 4
-
 "I enjoyed these layouts. Simple, elegant and cinematic. I couldn't wait to draw Hiro!"
 -
 "I ended up doing a screen capture from Kaito's funeral from season 2 and moved people around, but it's largely the same frame. I do like my Hiro. I think I got reference from season 1 here. The trees were a bit experimental for panel four and I like the gothic noir feel it has. Those of you paying attention might have seen my geek Easter Egg and noticed that I used Hiro's boss, Mr Kin Egami as the executive who confronts Kimiko."
 -
 "I especially like how all the people turned out. I felt that panel 1 got a bit muddy and confusing from poor composition, though."
 -
 "Panel 1 got a bit muddy, but I like the way the rest turned out. If I hadn't been referencing an actual scene from the show, I would have set this at sunset for more dramatic lighting than in the middle of a sunny day."
 -
 "Some added lighting effects. It was a buzz to draw Hiro again. I love drawing the guy. He's just so easy to draw. Overall for a fast, rushed page, this turned out really well. To give you an idea of how rushed, I drew and coloured pages 4, 5 and 6 over two days!"


Page 5
-
!["It was actually [this page]...that really motivated me to get Annette back on board. While I'm reasonably happy with the way I colour figures, the way I colour backgrounds irritates the hell out of me. When I put heaps of effort in, it looks cheated and I don't like that. Working with Annette will give me the time to draw it properly and avoid the horrendous cheat that I used on page 5 panel 2. It was just supposed to be a placeholder, to remind me I need to draw a proper background, but computer issues [and] my deadline...forced [me] to leave the photo in."](/images/thumb/a/ad/Past_Experience%2C_p5_line_art.jpg/79px-Past_Experience%2C_p5_line_art.jpg) "It was actually [this page]...that really motivated me to get Annette back on board. While I'm reasonably happy with the way I colour figures, the way I colour backgrounds irritates the hell out of me. When I put heaps of effort in, it looks cheated and I don't like that. Working with Annette will give me the time to draw it properly and avoid the horrendous cheat that I used on page 5 panel 2. It was just supposed to be a placeholder, to remind me I need to draw a proper background, but computer issues [and] my deadline...forced [me] to leave the photo in."
"It was actually [this page]...that really motivated me to get Annette back on board. While I'm reasonably happy with the way I colour figures, the way I colour backgrounds irritates the hell out of me. When I put heaps of effort in, it looks cheated and I don't like that. Working with Annette will give me the time to draw it properly and avoid the horrendous cheat that I used on page 5 panel 2. It was just supposed to be a placeholder, to remind me I need to draw a proper background, but computer issues [and] my deadline...forced [me] to leave the photo in." -
 "Two out of four backgrounds ain't so good. It's not my finest hour, but it definitely was my most desperate. Even panel 1 on page 5 annoys me. The texturing looks too realistic if you ask me. I should have gone for something more stylised. I actually get annoyed when my stuff looks too photo-like."
!["It was actually [this page]...that really motivated me to get Annette back on board. While I'm reasonably happy with the way I colour figures, the way I colour backgrounds irritates the hell out of me. When I put heaps of effort in, it looks cheated and I don't like that. Working with Annette will give me the time to draw it properly and avoid the horrendous cheat that I used on page 5 panel 2. It was just supposed to be a placeholder, to remind me I need to draw a proper background, but computer issues [and] my deadline...forced [me] to leave the photo in."](/wiki/File:Past_Experience,_p5_line_art.jpg)

Page 6
-
!["I ended up leaving page 5 and moving onto page 6...I had more fun with page 6 as I actually got to draw some stuff. I like the lighting of the top panel. I was also trying to mirror [Kaito]'s body language from page 3 panel 2 here on panel 2 with Kimiko. I feel that she has already become her father's daughter in this panel."](/images/thumb/b/b0/Past_Experience%2C_p6_line_art.jpg/79px-Past_Experience%2C_p6_line_art.jpg) "I ended up leaving page 5 and moving onto page 6...I had more fun with page 6 as I actually got to draw some stuff. I like the lighting of the top panel. I was also trying to mirror [Kaito]'s body language from page 3 panel 2 here on panel 2 with Kimiko. I feel that she has already become her father's daughter in this panel."
"I ended up leaving page 5 and moving onto page 6...I had more fun with page 6 as I actually got to draw some stuff. I like the lighting of the top panel. I was also trying to mirror [Kaito]'s body language from page 3 panel 2 here on panel 2 with Kimiko. I feel that she has already become her father's daughter in this panel." -
 "I used a cinematic trick that they do on the show on panel 4. For some reason I notice that they use a framing blur on certain images, usually trying to highlight someone's eyes. I thought I would do the same here."
!["I ended up leaving page 5 and moving onto page 6...I had more fun with page 6 as I actually got to draw some stuff. I like the lighting of the top panel. I was also trying to mirror [Kaito]'s body language from page 3 panel 2 here on panel 2 with Kimiko. I feel that she has already become her father's daughter in this panel."](/wiki/File:Past_Experience,_p6_line_art.jpg)

Notes about Jason's drawings are taken from his weblog.