Character connections: Difference between revisions
imported>Jmfdr91 |
imported>Jmfdr91 |
||
| Line 113: | Line 113: | ||
* {{connect|Danko}} and Angela meet to talk about [[Nathan]]. (''[[Shades of Gray]]'') |
* {{connect|Danko}} and Angela meet to talk about [[Nathan]]. (''[[Shades of Gray]]'') |
||
* {{connect|Elle}} is fired by Angela. {{epp|302}} |
* {{connect|Elle}} is fired by Angela. {{epp|302}} |
||
* {{connect|Emma}} meets Angela at Peter´s apartment. (''[[Close to You]]'') |
|||
* {{connect|Hana}} reads about Angela in the [[Lonestar File]]. (''[[War Buddies, Part 5]]'') |
* {{connect|Hana}} reads about Angela in the [[Lonestar File]]. (''[[War Buddies, Part 5]]'') |
||
* {{connect|Hiro}} watches Angela slap Kaito. (''[[Cautionary Tales]]'') |
* {{connect|Hiro}} watches Angela slap Kaito. (''[[Cautionary Tales]]'') |
||
| Line 292: | Line 293: | ||
* {{connect|Ando}} meets Charlie at the [[Burnt Toast Diner]]. (''[[Seven Minutes to Midnight]]'') |
* {{connect|Ando}} meets Charlie at the [[Burnt Toast Diner]]. (''[[Seven Minutes to Midnight]]'') |
||
* {{connect|Arnold}} kidnaps Charlie. (''[[Once Upon a Time in Texas]]'') |
* {{connect|Arnold}} kidnaps Charlie. (''[[Once Upon a Time in Texas]]'') |
||
* {{connect|Emma}} hears Charlie's story from Hiro. (''[[Tabula Rasa]]'') |
|||
* {{connect|Hiro}} loves Charlie. (''[[Seven Minutes to Midnight]]'') |
* {{connect|Hiro}} loves Charlie. (''[[Seven Minutes to Midnight]]'') |
||
* {{connect|Isaac}} [[paints]] Charlie. (''[[Seven Minutes to Midnight]]'') |
* {{connect|Isaac}} [[paints]] Charlie. (''[[Seven Minutes to Midnight]]'') |
||
| Line 461: | Line 463: | ||
* {{connect|Danko}} interrogates and tortures Doyle. (''[[Puppet with No Strings]]'') |
* {{connect|Danko}} interrogates and tortures Doyle. (''[[Puppet with No Strings]]'') |
||
* {{connect|Elle}} is seen by Doyle [[electric manipulation|knocking out Level 5's power grid]]. (''[[Graphic Novel:Doyle|Doyle]]'') |
* {{connect|Elle}} is seen by Doyle [[electric manipulation|knocking out Level 5's power grid]]. (''[[Graphic Novel:Doyle|Doyle]]'') |
||
* {{connect|Emma}} is controled by Doyle. (''Brave New World) |
|||
* {{connect|Flint}} was co-incarcerated with Doyle in [[Level 5]]. (''[[The Butterfly Effect]]'') |
* {{connect|Flint}} was co-incarcerated with Doyle in [[Level 5]]. (''[[The Butterfly Effect]]'') |
||
* {{connect|Jesse}} was incarcerated with Doyle in [[Level 5]]. (''[[The Butterfly Effect]]'') |
* {{connect|Jesse}} was incarcerated with Doyle in [[Level 5]]. (''[[The Butterfly Effect]]'') |
||
| Line 537: | Line 540: | ||
* {{connect|Tracy}} is present with Elle when Arthur sketches the [[eclipse]]. (''[[It's Coming]]'') |
* {{connect|Tracy}} is present with Elle when Arthur sketches the [[eclipse]]. (''[[It's Coming]]'') |
||
* {{connect|West}} is attacked by Elle. (''[[Cautionary Tales]]'') |
* {{connect|West}} is attacked by Elle. (''[[Cautionary Tales]]'') |
||
|} |
|||
{| |
|||
|- valign=top |
|||
||[[ImagePemma.jpg|thumb|Emma plays the piano with Peter.]] |
|||
| |
|||
===[[Emma]]=== |
|||
* {{connect|Angela}} meets Emma at Peter´s apartment. (''[[Close to You]]'') |
|||
* {{connect|Charlie|Charlies's}} story is heard by Emma. (''[[Cautionary Tales]]'') |
|||
* {{connect|Doyle}} controls Emma. (''Brave New World) |
|||
* {{connect|Hiro}} meets Emma at the hospital. (''[[Tabula Rasa]]'') |
|||
* {{connect|Lauren|Lauren's}} wound is treated by Emma. (''[[The Wall]]'') |
|||
* {{connect|Lydia}} [[empathy|finds]] Emma. (''[[Upon This Rock]]'') |
|||
* {{connect|Peter}} works in the same hospital as Emma. (''[[Ink]]'') |
|||
* {{connect|Samuel}} passes near Emma in the park. (''[[Ink]]'') |
|||
* {{connect|Sylar}} saves Emma from Doyle´s control. (''[[Brave New World]]'') |
|||
|} |
|} |
||
{| |
{| |
||
| Line 605: | Line 624: | ||
* {{connect|Edgar}} watches Hiro receive a fortune from a [[fortune teller]]. (''[[Stolen Fate]]'') |
* {{connect|Edgar}} watches Hiro receive a fortune from a [[fortune teller]]. (''[[Stolen Fate]]'') |
||
* {{connect|Elle}} is teleported away against her will by Hiro. (''[[The Eclipse, Part 2]]'') |
* {{connect|Elle}} is teleported away against her will by Hiro. (''[[The Eclipse, Part 2]]'') |
||
* {{connect|Emma}} meets Hiro at the hospital. (''[[Tabula Rasa]]'') |
|||
* {{connect|Flint}} is seen by Hiro in his spirit walk. (''[[Villains]]'') |
* {{connect|Flint}} is seen by Hiro in his spirit walk. (''[[Villains]]'') |
||
* {{connect|Hana}} is sent a message on [[Hiro's blog]]. (''[[Heroes Evolutions]]'') |
* {{connect|Hana}} is sent a message on [[Hiro's blog]]. (''[[Heroes Evolutions]]'') |
||
| Line 739: | Line 759: | ||
* {{connect|Claire}} has Thanksgiving dinner with Lauren. (''[[Thanksgiving]]'') |
* {{connect|Claire}} has Thanksgiving dinner with Lauren. (''[[Thanksgiving]]'') |
||
* {{connect|Edgar}} meets Lauren. (''[[Let It Bleed]]'') |
* {{connect|Edgar}} meets Lauren. (''[[Let It Bleed]]'') |
||
* {{connect|Emma}} treats Lauren's wound. (''[[The Wall]]'') |
|||
* {{connect|Hiro}} interrupts as Lauren is kissing Noah. (''[[Close to You]]'') |
* {{connect|Hiro}} interrupts as Lauren is kissing Noah. (''[[Close to You]]'') |
||
* {{connect|Isaac}} and Noah 's conversation is heard by Lauren. (''[[Once Upon a Time in Texas]]'') |
* {{connect|Isaac}} and Noah 's conversation is heard by Lauren. (''[[Once Upon a Time in Texas]]'') |
||
| Line 793: | Line 814: | ||
* {{connect|Danko|Danko's}} face appears as a tattoo on Lydia's back. (''[[Orientation]]'') |
* {{connect|Danko|Danko's}} face appears as a tattoo on Lydia's back. (''[[Orientation]]'') |
||
* {{connect|Edgar}} works with Lydia. (''[[Orientation]]'') |
* {{connect|Edgar}} works with Lydia. (''[[Orientation]]'') |
||
* {{connect|Emma}} is found by Lydia. (''[[Upon This Rock]]'') |
|||
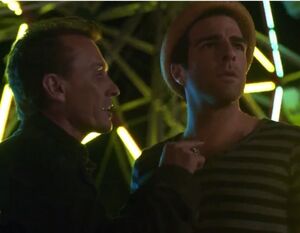
* {{connect|Hiro}} is seen by Lydia in [[the carnival]] (''[[Graphic Novel:Stolen Fate|Stolen Fate]]''), and his face appears as a tattoo on Lydia's back (''[[Jump, Push, Fall]]''). |
* {{connect|Hiro}} is seen by Lydia in [[the carnival]] (''[[Graphic Novel:Stolen Fate|Stolen Fate]]''), and his face appears as a tattoo on Lydia's back (''[[Jump, Push, Fall]]''). |
||
* {{connect|Mohinder}} is seen by Lydia. (''[[Thanksgiving]]'') |
* {{connect|Mohinder}} is seen by Lydia. (''[[Thanksgiving]]'') |
||
| Line 1,180: | Line 1,202: | ||
* {{connect|Edgar}} duels with Peter. (''[[Jump, Push, Fall]]'') |
* {{connect|Edgar}} duels with Peter. (''[[Jump, Push, Fall]]'') |
||
* {{connect|Elle}} is looking for Peter in [[Cork, Ireland]]. (''[[Episode:Fight or Flight|Fight or Flight]]'') They first meet at the Company. (''[[Episode:Four Months Ago...|Four Months Ago...]]'') |
* {{connect|Elle}} is looking for Peter in [[Cork, Ireland]]. (''[[Episode:Fight or Flight|Fight or Flight]]'') They first meet at the Company. (''[[Episode:Four Months Ago...|Four Months Ago...]]'') |
||
* {{connect|Emma}} works in the same hospital as Peter. (''[[Ink]]'') |
|||
* {{connect|Flint}} roughs Peter up after he and Knox discover that Peter is [[body insertion|impersonating]] [[Jesse Murphy]]. {{epp|303}} |
* {{connect|Flint}} roughs Peter up after he and Knox discover that Peter is [[body insertion|impersonating]] [[Jesse Murphy]]. {{epp|303}} |
||
* {{connect|Hiro}} meets Peter for the first time at Kirby Plaza. (''[[Episode:How to Stop an Exploding Man|How to Stop an Exploding Man]]'') They meet again at Primatech, four months later, where they clash over Adam. (''[[Episode:Truth and Consequences|Truth and Consequences]]'', ''[[Episode:Powerless|Powerless]]'') |
* {{connect|Hiro}} meets Peter for the first time at Kirby Plaza. (''[[Episode:How to Stop an Exploding Man|How to Stop an Exploding Man]]'') They meet again at Primatech, four months later, where they clash over Adam. (''[[Episode:Truth and Consequences|Truth and Consequences]]'', ''[[Episode:Powerless|Powerless]]'') |
||
| Line 1,276: | Line 1,299: | ||
* {{connect|Danko|Danko's}} death is ordered by Samuel. (''[[Orientation]]'') |
* {{connect|Danko|Danko's}} death is ordered by Samuel. (''[[Orientation]]'') |
||
* {{connect|Edgar}} works for Samuel. (''[[Orientation]]'') |
* {{connect|Edgar}} works for Samuel. (''[[Orientation]]'') |
||
* {{connect|Emma}} is eating in the park as Samuel passes near her. (''[[Ink]]'') |
|||
* {{connect|Hiro}} is "set on a righteous path" by Samuel. (''[[Jump, Push, Fall]]'') |
* {{connect|Hiro}} is "set on a righteous path" by Samuel. (''[[Jump, Push, Fall]]'') |
||
* {{connect|Lauren}} spots Samuel. (''[[The Art of Deception]]'') |
* {{connect|Lauren}} spots Samuel. (''[[The Art of Deception]]'') |
||
| Line 1,372: | Line 1,396: | ||
* {{connect|Edgar}} and Sylar clash over [[Lydia]]. (''[[Tabula Rasa]]'') |
* {{connect|Edgar}} and Sylar clash over [[Lydia]]. (''[[Tabula Rasa]]'') |
||
* {{connect|Elle}} shoots [[lightning]] at Sylar. (''[[Powerless]]'') |
* {{connect|Elle}} shoots [[lightning]] at Sylar. (''[[Powerless]]'') |
||
* {{connect|Emma}} is saved from Doyle´s control thanks to Sylar. (''[[Brave New World]]'') |
|||
* {{connect|Flint}} watches Sylar from the [[Level 5]] corridor. (''[[Dying of the Light]]'') |
* {{connect|Flint}} watches Sylar from the [[Level 5]] corridor. (''[[Dying of the Light]]'') |
||
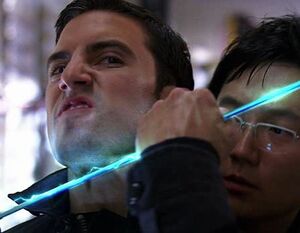
* {{connect|Hiro}} holds a [[Kensei sword|sword]] against Sylar's neck. (''[[The Hard Part]]'') |
* {{connect|Hiro}} holds a [[Kensei sword|sword]] against Sylar's neck. (''[[The Hard Part]]'') |
||
Revision as of 09:24, 14 February 2010
| Character connections | |
|---|---|
 Strangers in the (Fly By) Night |
The seemingly disparate lives of characters on Heroes are inevitably connected to one another.
Characters
| Contents: edit |
Adam • Alex • Amanda • Ando • Angela • Anne • Arnold • Arthur • Audrey • Bob • Candice • Caspar • Chandra • Charles • Charlie • Claire • Claude • Danko • Daphne • D.L. • Doyle • Eden • Edgar • Elle • Emily • Emma • Erica • Flint • Hana • Harris • Hiro • Isaac • Jesse • Joanne • Kaito • Knox • Lauren • Mr. Linderman • Luke • Lydia • Malina • Matt • Maury • Maya • Meredith • Micah • Miko • Mohinder • Molly • Monica • Nathan • Niki/Jessica • Noah • Peter • Quentin • Rachel • René • Samuel • Sandra • Simone • Sparrow • Sylar • Ted • Thompson • Tommy • Tracy • Usutu • West |
 |
Adam
|
 |
Alex
|
 |
Amanda
|
 |
Ando
|
 |
Angela
|
 |
Arnold
|
 |
Arthur
|
 |
Audrey
|
 |
Bob
|
 |
Candice
|
 |
Chandra
|
 |
Charles
|
 |
Charlie
|
 |
Claire
|
 |
Claude
|
 |
Danko
|
 |
Daphne
|
 |
D.L.
|
 |
Doyle
|
 |
Eden
|
 |
Edgar
|
 |
Elle
|
| thumb|Emma plays the piano with Peter. |
Emma
|
 |
Flint
|
 |
Hana
|
 |
Hiro
|
 |
Isaac
|
 |
Jesse
|
 |
Kaito
|
 |
Knox
|
 |
Lauren
|
 |
Mr. Linderman
|
 |
Lydia
|
 |
Matt
|
 |
Maury
|
 |
Maya
|
 |
Meredith
|
 |
Micah
|
 |
Mohinder
|
 |
Molly
|
 |
Monica
|
 |
Nathan
|
 |
Noah
|
 |
Niki/Jessica
|
 |
Peter
|
 |
Rachel
|
 |
René
|
 |
Samuel
|
 |
Sandra
|
 |
Simone
|
 |
Sparrow
|
 |
Sylar
|
 |
Ted
|
 |
Thompson
|
 |
Tracy
|
 |
Usutu
|
 |
West
|
| Contents: edit |
Adam • Alex • Amanda • Ando • Angela • Anne • Arnold • Arthur • Audrey • Bob • Candice • Caspar • Chandra • Charles • Charlie • Claire • Claude • Danko • Daphne • D.L. • Doyle • Eden • Edgar • Elle • Emily • Emma • Erica • Flint • Hana • Harris • Hiro • Isaac • Jesse • Joanne • Kaito • Knox • Lauren • Mr. Linderman • Luke • Lydia • Malina • Matt • Maury • Maya • Meredith • Micah • Miko • Mohinder • Molly • Monica • Nathan • Niki/Jessica • Noah • Peter • Quentin • Rachel • René • Samuel • Sandra • Simone • Sparrow • Sylar • Ted • Thompson • Tommy • Tracy • Usutu • West |
Memorable Quotes
"It's New York. Everyone runs into each other sooner or later."
- - Peter (to Simone) (One Giant Leap)
"Look, don't you get it? Everything is connected. We are all connected. If this thing that you painted, this bomb, is true, we're all dead. These are the key to saving us."
"I think it's all connected. Everything. What you and I can do? We're all connected."
- - Matt (to Nathan) (The Kindness of Strangers)
"We're all connected. Our hopes and our dreams, our children's future reflecting back in each other's eyes. We fight our own personal battles. But we know we're not alone. Because only together can we make our short time on this planet mean something. Only together can we be the stewards of our own destiny. And we hold in our collective hearts one noble goal: save ourselves, save the world."
- - Nathan (his message from God) (The Second Coming)
"You're one of us. People with powers. We're all connected. You don't have to be alone."
- - Micah (to Sylar) (I Am Sylar)
Notes
- Information on Hiro's blog shows that Hiro contacts Hana using Kaito's email address. He informs Hana that he has found Molly Walker. Another blog entry is a note to Hana pointing her in D.L.'s direction, with an accompanying email that gives Isaac's address as a meeting point.
- In an interview, Tim Kring, was asked about the eclipse. He responded, "In the pilot, the eclipse was really meant mainly to be a single global event that could connect all these characters visually and in time."