User:Cockney Heroes/The Team/Catalyst: Difference between revisions
imported>Catalyst No edit summary |
imported>Catalyst No edit summary |
||
| (One intermediate revision by the same user not shown) | |||
| Line 12: | Line 12: | ||
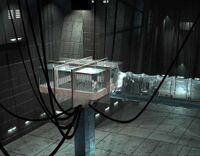
|align=center|{{Imagelink|image=CH London Prison.jpg|height=155.5|width=200|link=User:Cockney Heroes/Places/Cell Block B}} |
|align=center|{{Imagelink|image=CH London Prison.jpg|height=155.5|width=200|link=User:Cockney Heroes/Places/Cell Block B}} |
||
|align=center|{{Imagelink|image=CH Block C.jpg|height=155.5|width=200|link=User:Cockney Heroes/Places/Cell Block C}} |
|align=center|{{Imagelink|image=CH Block C.jpg|height=155.5|width=200|link=User:Cockney Heroes/Places/Cell Block C}} |
||
| ⚫ | |||
|- |
|- |
||
|align=center|[[User:Cockney Heroes/Places/Cell Block A|'''Cell Block A''']] |
|align=center|[[User:Cockney Heroes/Places/Cell Block A|'''Cell Block A''']] |
||
|align=center|[[User:Cockney Heroes/Places/Cell Block B|'''Cell Block B''']] |
|align=center|[[User:Cockney Heroes/Places/Cell Block B|'''Cell Block B''']] |
||
|align=center|[[User:Cockney Heroes/Places/Cell Block C|'''Cell Block C''']] |
|align=center|[[User:Cockney Heroes/Places/Cell Block C|'''Cell Block C''']] |
||
| ⚫ | |||
|}</center> |
|}</center> |
||
<center> |
<center> |
||
{| border="0" width=71% |
{| border="0" width=71% |
||
| ⚫ | |||
|align=center|{{Imagelink|image=Bob's office.jpg|height=155.5|width=200|link=User:Cockney Heroes/Places/Consuela's Office}} |
|align=center|{{Imagelink|image=Bob's office.jpg|height=155.5|width=200|link=User:Cockney Heroes/Places/Consuela's Office}} |
||
|align=center|{{Imagelink|image=CH Block B Cell.jpg|height=155.5|width=200|link=User:Cockney Heroes/Places/Irony and Derek's Cell}} |
|align=center|{{Imagelink|image=CH Block B Cell.jpg|height=155.5|width=200|link=User:Cockney Heroes/Places/Irony and Derek's Cell}} |
||
| ⚫ | |||
| ⚫ | |||
|- |
|- |
||
| ⚫ | |||
|align=center|[[User:Cockney Heroes/Places/Consuela's Office|'''Consuela's Office''']] |
|align=center|[[User:Cockney Heroes/Places/Consuela's Office|'''Consuela's Office''']] |
||
|align=center|[[User:Cockney Heroes/Places/Irony and Derek's Cell|'''Irony and Derek's Cell''']] |
|align=center|[[User:Cockney Heroes/Places/Irony and Derek's Cell|'''Irony and Derek's Cell''']] |
||
| ⚫ | |||
| ⚫ | |||
|}</center> |
|}</center> |
||
<center> |
<center> |
||
{| border="0" width=71% |
{| border="0" width=71% |
||
| ⚫ | |||
| ⚫ | |||
|align=center|{{Imagelink|image=CH Mall.jpg|height=155.5|width=200|link=User:Cockney Heroes/Places/Sydney Seaside Mall}} |
|align=center|{{Imagelink|image=CH Mall.jpg|height=155.5|width=200|link=User:Cockney Heroes/Places/Sydney Seaside Mall}} |
||
|- |
|||
| ⚫ | |||
| ⚫ | |||
| ⚫ | |||
|}</center> |
|||
<center> |
|||
{| border="0" width=50% |
|||
|align=center|{{Imagelink|image=Convenience store.jpg|height=155.5|width=200|link=User:Cockney Heroes/Places/The Corner Shop}} |
|align=center|{{Imagelink|image=Convenience store.jpg|height=155.5|width=200|link=User:Cockney Heroes/Places/The Corner Shop}} |
||
|align=center|{{Imagelink|image=Agent Taub's apartment.jpg|height=155.5|width=200|link=User:Cockney Heroes/Places/The Millers' Apartment}} |
|||
|align=center|{{Imagelink|image=CH Bunker.jpg|height=155.5|width=200|link=User:Cockney Heroes/Places/The Underground Bunker}} |
|align=center|{{Imagelink|image=CH Bunker.jpg|height=155.5|width=200|link=User:Cockney Heroes/Places/The Underground Bunker}} |
||
|- |
|- |
||
| ⚫ | |||
|align=center|[[User:Cockney Heroes/Places/The Corner Shop|'''The Corner Shop''']] |
|align=center|[[User:Cockney Heroes/Places/The Corner Shop|'''The Corner Shop''']] |
||
|align=center|[[User:Cockney Heroes/Places/The Millers' Apartment|'''The Millers' Apartment''']] |
|||
|align=center|[[User:Cockney Heroes/Places/The Underground Bunker|'''The Underground Bunker''']] |
|align=center|[[User:Cockney Heroes/Places/The Underground Bunker|'''The Underground Bunker''']] |
||
|}</center> |
|}</center> |
||
| Line 47: | Line 48: | ||
==Created Items== |
==Created Items== |
||
<center> |
<center> |
||
{| border="0" width= |
{| border="0" width=50% |
||
|align=center|{{Imagelink|image=Curtis's Pills.jpg|height=155.5|width=200|link=User:Cockney Heroes/Items/Curtis's Pills}} |
|align=center|{{Imagelink|image=Curtis's Pills.jpg|height=155.5|width=200|link=User:Cockney Heroes/Items/Curtis's Pills}} |
||
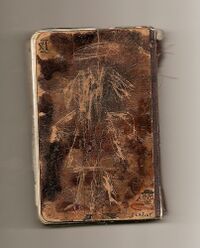
|align=center|{{Imagelink|image=Karl's Journal.jpg|height=155.5|width=200|link=User:Cockney Heroes/Items/Karl's Journal}} |
|align=center|{{Imagelink|image=Karl's Journal.jpg|height=155.5|width=200|link=User:Cockney Heroes/Items/Karl's Journal}} |
||
Latest revision as of 04:30, 29 June 2009

Member: Catalyst
Character: John Wright
Ability: Machine Mimicry
Catalyst joined Cockney Heroes on the 24th of May, year 2009. As of now his jobs to contribute to Cockney Heroes are to update portals, create pages for new places and items, and to find images for the places and items. His character is John Wright, who was a former mechanic. Once attacked by agents, in hopes to catch him, was hit over the had, causing amnesia. His ability is Machine Mimicry, to have one's insides completely made up of machinery in result causing you to be nearly indestructible. He has great strength and can heal when ever injured, though the approximate time to heal bigger wounds is twenty-four hours. Catalyst's favorite episode of Cockney Heroes is Shark of the Streets.
Places Created
Volume Two: Baptism of Fire
| Cell Block A | Cell Block B | Cell Block C |
| Cell Block D | Consuela's Office | Irony and Derek's Cell |
| Obadiah's Cell | Solitary Confinement | Sydney Seaside Mall |
| The Corner Shop | The Underground Bunker |
Created Items
| Curtis's Pills | Karl's Journal |
| L | Cockney Heroes | edit |
| Episodes | |
|---|---|
| V1: Teething Problems |
Hidden in the Darkness • Nemesis • How to Stop an Exploding Van • Pinehearst • Company Men • Requiem of a Prison Break • Jack the Ripper • Murder at Whitechapel • Ambush from an Outside Source |
| V2: Baptism of Fire |
Veni Vidi Expugnavi • Shark of the Streets • Imprisoned • Live Together, Die Alone • Déjà Vu • Sliding Doors • Shattered Lives • The Wanderer Returns • Midas Touch • Room 410 • Kill or Be Killed • The Die Is Cast
|
| Origins Chapters |
Dave Rogers: 1 - 2 - 3 • Derek Simmonds: 1 - 2 - 3 • Pam Marshall: 1 - 2 - 3 • Karl Hall: 1 - 2
|
| Items | |
|---|---|
| Items |
Nissan Cube • Golden Board • Food Tray • Karl's Journal • Van |
| Origins Items |
|
| Volumes | |
|---|---|
| Volumes | |
| The Team: Irony • Leckie • Radicell • Danko • Gabriel Bishop • Altes • See Also: Catalyst • Laughingdevilboy |
|---|


